When I first started blogging, I knew photography was an important factor, but I don’t think I fully grasped just how essential it was to the process. Photos are how I tell bring my experiences to life both here on the blog and on social media, so I had to learn the basics of photography pretty quickly.
I by no means consider myself an expert but I have come a long way since the early days. I learned how to use my DSLR camera, have had multiple lens upgrades and now regularly travel with a tripod. Despite having professional equipment, I’ll admit that there are definitely times where it is just easier to whip out my phone and snap a quick pic.
With continued improvements to cell phone camera technology, they actually can be an excellent option. They are easy to use and produce high quality photos, making them a practical option for the casual traveler. But don’t just automatically start taking amazing pictures. There are definitely a few simple rules to keep in mind and tips to follow that will improve your iPhone photos. Below are my top 10 tips for instantly taking better iPhone photos!
1. SHOOT IN GOOD LIGHTING
The best way to guarantee a good photo is to shoot in good lighting. While there are some powerful editing tools, if a photo’s lighting is bad, there won’t be much you can do to salvage it. The best times to shoot is just after sunrise and right before sunset or what’s known as golden hour. The lighting is warmer and softer and casts a beautiful glow that makes for really magical pictures.
When shooting during the day, it’s best when the sky is overcast and the light is evenly distributed. However, I personally prefer sunny days with blue skies because it makes colors pop. It’s best to avoid direct sunlight which can create shadows that can be difficult to deal with. If you can find shaded areas, you’ll still get the brightness without the weird shadows.
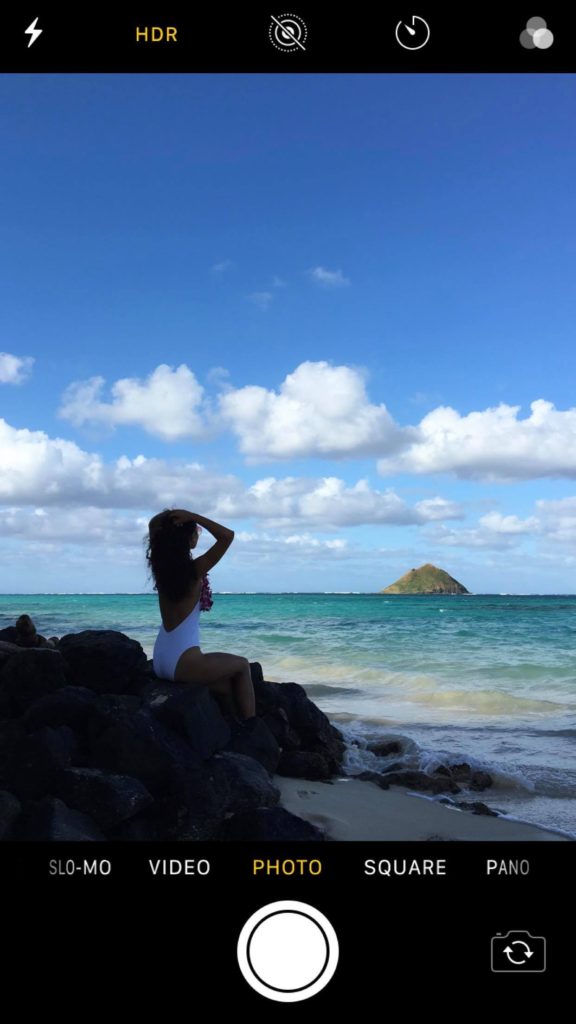
This is an example of a mixed lighting scenario where the HDR function is helpful.
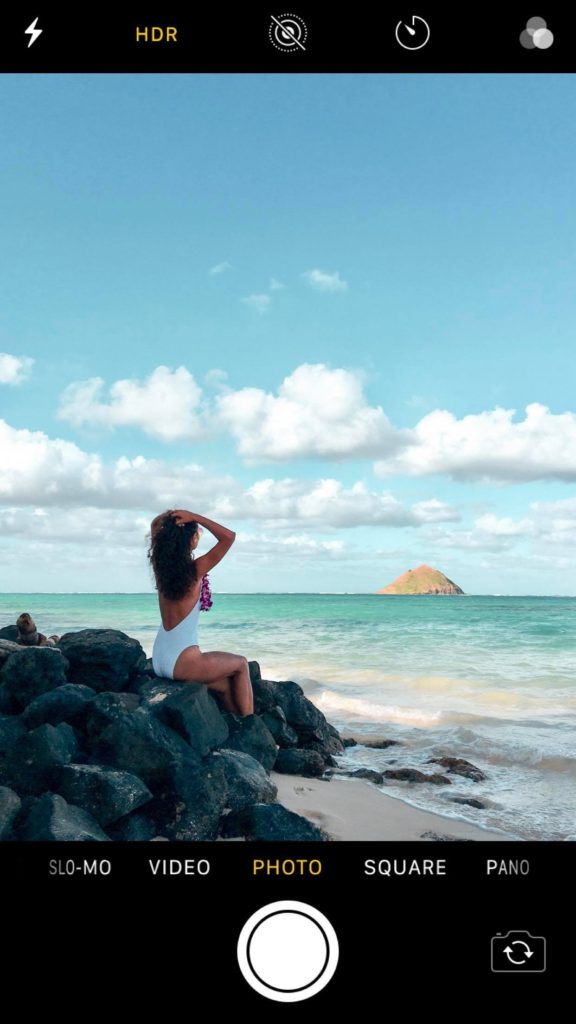
This shows the result of utilizing HDR and increasing the exposure and shadows in Lightroom.
2. UTILIZE THE HDR FUNCTION
When you find yourself in mixed light situations, switching to HDR mode or high dynamic range, can help you deal with it. HDR mimics what your eye sees and helps balance the lighting when there are both bright and shaded areas in the frame. Just be sure to keep your hand steady, because HDR works by taking 2 separate photos (one brightening the shadows and one darkening the bright areas) and combining them which takes a few extra seconds to process. Turn on this function by tapping HDR on the top tool bar of your camera mode.
3. DON’T BE AFRAID TO TRY DIFFERENT ANGLES
Kneel down. Stand on a chair. Get close to your subject. Just get creative! You never know what could produce that perfect shot!
4. FOLLOW THE RULE OF THIRDS
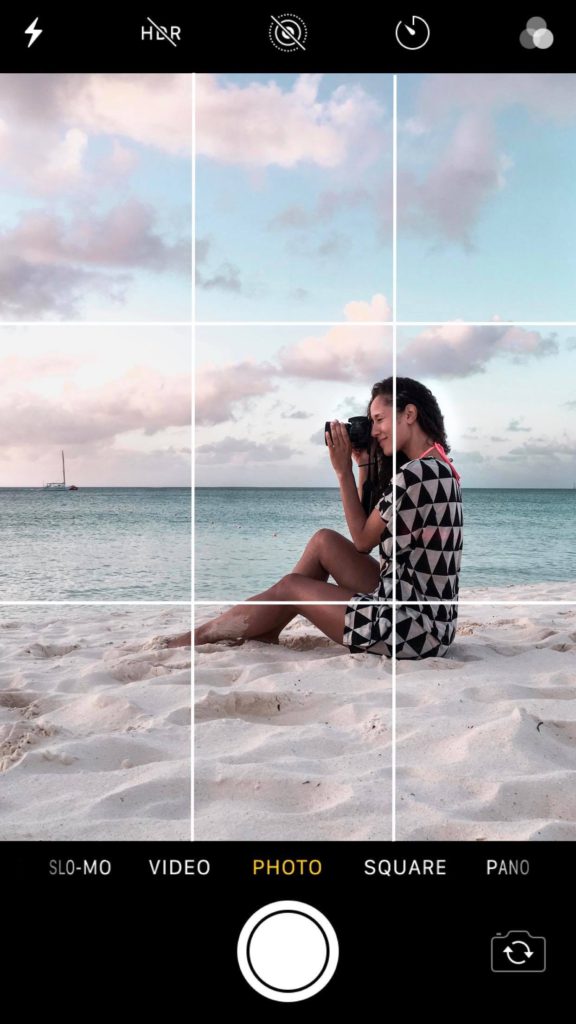
If you’ve dipped your toe into photography at all, you’ve probably heard something about the rule of thirds. If not, it’s the concept that an image should be thought of as divided into 9 equal parts created by two vertical lines and two horizontal and that the main elements in a photo should be placed on those lines or inside the panes. Doing so is said to create a more dynamic image than if the main subject is just in the center.
5. KEEP YOUR HORIZON LINES STRAIGHT
Nothing ruins an otherwise beautiful photo quicker than having crooked horizon line. Whether you’re photographing water or land, keeping the lines straight in your image is a must! If you forget or don’t get it just right, you can easily straighten lines in your images by selecting the cropping tool in your phone’s photo editor.
6. TURN ON YOUR GRID
The easiest way to follow the rule of thirds and maintain straight horizon lines is by simply turning on your grid! Go to your settings, scroll down to camera and switch your grid to on. This will add 9 panes to your camera and will dramatically help you frame your shots!
7. LOCK THE FOCUS ON YOUR SUBJECT
Nothing is worse than taking what you think is the perfect photo on to realize the main subject is totally out of focus! An easy way to avoid this is to tap the area of the screen that you want to focus on. This sets the focus exactly where you want it and also adjusts the exposure. You can lock in these setting by tapping and holding over your main subject until AE/AF Lock appears on your screen.
8. ADJUST YOUR EXPOSURE
The same technique allows you to tweak a photo’s exposure (brightness). After tapping on the area you want to lighten or darken and the yellow box appears, you’ll notice a symbol of a sun pop up to the right of the box. Sliding the sun symbol up and down allows you to darken or lighten the exposure accordingly.

9. USE YOUR PHONE’S LEVEL TO SLAY YOUR FLAT-LAYS
When taking a photo of a flat surface or from above and your phone is oriented horizontally, you can ensure your phone is perfectly level by aligning the two crosses that appear in the center of your screen (see photo above). Once there is a single yellow cross, your phone is perfectly flat and you’re ready to snap away!
10. ORIENT YOUR PHOTOS FOR THE PLATFORM WHERE YOU PLAN TO SHARE THEM
Now that you’ve learned a tips to taking better iphone photos, you’re going to want to share them! Just be sure to orient them for the platform where you plan to post. Photos posted on Instagram should preferably be shot vertically. Horizontal photos are better on Facebook, Twitter and blog posts (although I often use vertical photos here too!) If you like a particular scene, take a few shots vertically and horizontally so you have options later.
I hope you found some of these tips helpful and you feel ready to get out there and snap away! At the end of the day, photography should be a fun, creative outlet!
Anything you would add to the list? What other photography questions do you have?
PIN IT!




No Comments